Showing posts with label recipes. Show all posts

Saturday, November 26, 2011

Frozen Hot Chocolate

I decided to participate in Black Friday this year. So today I am T.I.R.E.D!! But I wanted to share a yummy recipe with you.

I have a new love.
It's name is not just hot chocolate
but FROZEN hot chocolate.

Yes I know it is cold outside but seriously this is the best frozen drink ever. 
You HAVE to try it!

I originally got the recipe HERE but after trying it I changed it a little and made it much more simple!

Here is what you need and what I did:
3T granulated sugar
2 packages of hot chocolate mix
2T unsalted butter
12oz can evaporated milk
Ice
Whipped Cream

Combine sugar, butter and hot chocolate mixes in a double boiler. 
Heat until it's paste-like then add 1/2 of the evaporated milk
Cool to room temperature
Combine chocolate mixture, the rest of the evaporated milk, and ice in a blender.
Pour into a cup and top with whipped cream!

Oh So Yummy!!

The next time I make this I am going to skip the heating part and just melt the butter and add to everything and blend with ice. We'll see how that turns out!

Oh and I promise to try to remember to start taking pictures of my recipes I make!! I always forget!!!


Melissa

Thursday, November 24, 2011

i can't believe i forgot!!

i totally forgot to post yesterday!!! aaaah!!  but i am here now, and i have such a fun thing to post!!  mini pumpkin pies!! i made these for carson's 1st grade class.  they were a HUGE hit!! i saw kids shoving the whole pie in their mouths.  this is no special recipe.  it's the one off the label of the pumpkin can!!  the crust i used was one i haven't used for any of my pies before, but it will be now!!  it is pate brisee (patay brizay)  it's an all butter crust.  it is so flaky and tasty.  i do add more sugar than is called for, that is the only way i'll eat the crust.   anyway, i made the pate brisee for a 2 crust pie and rolled it out (the recipe can be found anywhere on the internet).  i then used a 3 inch cookie cutter and cut out my circles.


from there, i put the circle of dough into my muffin tin and pressed very gently down.  then i poured in my filling.  i baked at 450 for 10 minutes then turned it down to 350 and baked for 10 more minutes.  so easy!!  this made 48 mini pumpkin pies.  i did make more of these last night, but a little bit bigger.  i used a 4 inch cookie cutter instead and the crust came up to the top of the muffin cup.  this way, i made 24 mini pumpkin pies.  these are seriously so much fun!!!  at our thanksgiving, we'll have about 4 children under 7 and these are a perfect portion!!

i  am planning to post the pencil skirt later today when we get home from our thanksgiving dinner!!! 
i also wanted to mention a few things i am thankful for:  my home, husband, children and my friends here in lubbock that we get to spend time with today and every day!! i also am thankful for the canadian geese that fly over our apartments at all times of the day during this time of year!! (seriously, i love them) it is such a wonderful sound and sight!! ( i also love that my kids love them too!!!)
have a very wonderfully fantastic thanksgiving!!! see you later today!!

Wednesday, November 9, 2011

Seriously the best potatoes EVER

It was my turn to make dinner this past Sunday for the Sarager's. I came across this potato recipe on pinterest that I wanted to try out. And it was SO STINKIN GOOD. My father-in-law even said it needed to stay on the rotation for dinner once a month! I do not get compliments too often when I good for them so I was THRILLED to actually get good feedback!!! Then my mom tried some the next day and said she devoured them in a matter of minutes, they were THAT good =) I thought I would share this super yummy recipe with you all.

Twice Baked Potato Casserole
  • 5 lb russet potatoes
  • 10 sli bacon
  • 8 oz cream cheese
  • 0.5 c unsalted butter, melted
  • 1 c sour cream
  • 0.25 c chives, minced
  • 2.5 c cheddar cheese, grated
  • 2 t kosher salt
  • 0.5 t pepper
1. Preheat oven to 350 degrees. Peel potatoes, and cut into 1-inch chunks. Place in a large saucepan, and add enough cold water to cover by about 2 inches. Bring to a boil over medium-high heat, and reduce to a simmer. Cook until tender and easily pierced with a paring knife, about 20 minutes. Transfer to a colander to drain; return to pan, cover, and set aside.
2. Meanwhile, heat a large skillet over medium heat. Add bacon, and cook until crisp and browned, turning once. Transfer to paper towels to drain; let cool, and crumble into pieces.
3. Using a fork, mash the potatoes in pan until light and fluffy. Add the cream cheese, butter, and sour cream, and stir until combined and smooth. Add the chives, 2 cups cheddar cheese, half the bacon, salt, and pepper. Stir until well combined.
4. Transfer to a buttered 3-quart baking dish. Top with remaining 1/2 cup cheddar cheese. Bake until top is slightly golden and potatoes are heated through, about 30 minutes. Remove from oven; garnish with remaining bacon. Serve immediately.

I got the recipe HERE

Seriously try it! Everyone will love it!

Melissa

Tuesday, October 18, 2011

mmmm....soda floats...

this is not a craft. (we cleaned on saturday and i couldn't stand to think of a new huge sewing mess) this is time well spent with my first grader over one of my favorite treats of all time.  the other day, my husband surprised me and brought me my favorite soda: Jones Green Apple Soda.  in high school, my room was littered with these bottles, all green apple flavored.  i loved to make these into floats.  sooooo good.  the sour of the apple and the sweet of the vanilla ice cream.  mmmmmm.  so when jonathan brought these home for me, i also asked him to get vanilla ice cream the next time he ventured to the store.  i did not touch the soda until i had the ice cream.  i had been telling my oldest, carson about them all excited, he acted like he didn't care.  so i forced it on him last night (monday).  cody was asleep and jonathan is not interested.  carson loved them.  it helps that they are bright green (both of our favorite color) and are sooo good with their contrasting flavors.  mine was gone quickly, followed shortly by a stomach ache.  then carson told me he was too full to finish his and gave it to me....move over stomach ache!!!  no green apple float will go to waste!!  anyway, he was very satisfied with it and we got to spend some time together by ourselves, which was so nice.


something else we've been devouring that is also green:  green smoothies!!  we call them monster smoothies.  this is what i put in mine:  a bit of simply oj, 4 strawberries, 1 serving of lowfat yogurt, a huge handful of spinach, half a banana and oh, half a peach (i don't like ice in mine, since my blender won't blend it).  my kids love it, even though they see me put the spinach in it!! i've even dropped some pounds since i've started!!
you should try these yummy greenish treats for yourself!! one healthy, one not so healthy but equally delicious!!


Pin It

Friday, October 14, 2011

caramel apple chocolate covered cake pops!! oh yeah!!!

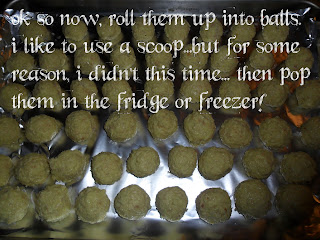
hello again!!! welcome back!! ever since i heard of cake pops, i have been all over that situation.  they are so fun and easy to make. they are a bit time consuming,so i like to read a book whilst making them or cleaning, i guess would be good too.  i had an epiphany while drifting to sleep one night...caramel apple cake pops, covered in chocolate and sprinkles....oh yeah.  i love regular caramel apples, but i find them somewhat bothersome to eat.  this is my version of regular caramel apples:  1 white cake mix, 2 apples, apple flavoring (hobby lobby, joanns, michaels), 1 can frosting, 1 pkg individually wrapped caramels, dipping chocolate or regular chocolate chips and add a bit of veg. oil, either lollipop sticks or some other type of stick.  i used skewer sticks because my walmart was out of lollipop sticks and the corn skewers were 50 for $1.  so, here we go!
peel and core apples.  slice them then stick them in a food processor.  make cake according to directions on pkg, but add your apples and the apple flavoring. (i added both! it comes in a pkg of 2)  i wanted them to be really apple-y.  bake according to pkg.  let cool.  now crumble.  this is a good spot to let your kids join in!  make sure they wash their hands (don't take their word for it, mine always say they did, but their hands and fingernails tell a different story)
now that the cake is all crumbled, i do this in the same pan as it was baked in, btw, it's time to add the frosting and melted caramel. i used a whole pkg of caramels.  for this recipe, please do not add all the frosting, if you wanted, you could even omit the frosting and just add the melted caramel to it!! now the pictures will tell the rest of the story...


 so, after dipping the cake pop in chocolate, let it drip for a minute, otherwise you will have a big chocolaty mess.  apply sprinkles by shaking them on, not dipping.  then, place it upright, into a cardboard cake pop stabbing apparatus that will hold them up. let them set for a minute or two, or whenever you are finished stabbing them all in the apparatus, then put them in the fridge.  they are best cold. (in my opinion)
                                           then you are done and it is time to consume them :)


they are not quite the same as caramel apples, but they are sure tasty!! and the caramel is just delightful!!
my boys helped me with these (and the above picture) and though, at times it is frustrating that they don't do it exactly how i tell them (as shown in the above picture), i love to see them really try hard, 'cause they want to eat them so badly!!  they LOVED the cake pop covered in candy corns!!
if i am making these for someone i like to individually wrap them. you can get little bags and ties in the cake section of walmart, joanns, hobby lobby, or michaels. don't for get your coupon!!
enjoy!!
                                                                      cherisse

Pin It